Deploying a web app for free
Intro
Goal of this guide: deploying a web frontend using Cloudflare free tier. Out of scope: actually building the web app.
Tech stack
This is of course not the only tech stack possible. I’ve chosen those products because they offer a lot of features while being free (Cloudflare DNS integrates nicely with Cloudflare Pages allowing to use the APEX, it’s possible to use it even without Cloudflare registrar, GitHub actions is free for open source projects, Cloudflare Pages uses worldwide CDN).
Requirements
Own GitHub and Cloudflare accounts. Own a domain name in a registrar that allows you to customize the nameservers.
Deployment checklist
Setup the cloudflare project
In the left menu Compute > Workers & Pages. Take note of the Account ID on the right side of the page and click on Create application button. You’ll need it for setting up continuous deployment.
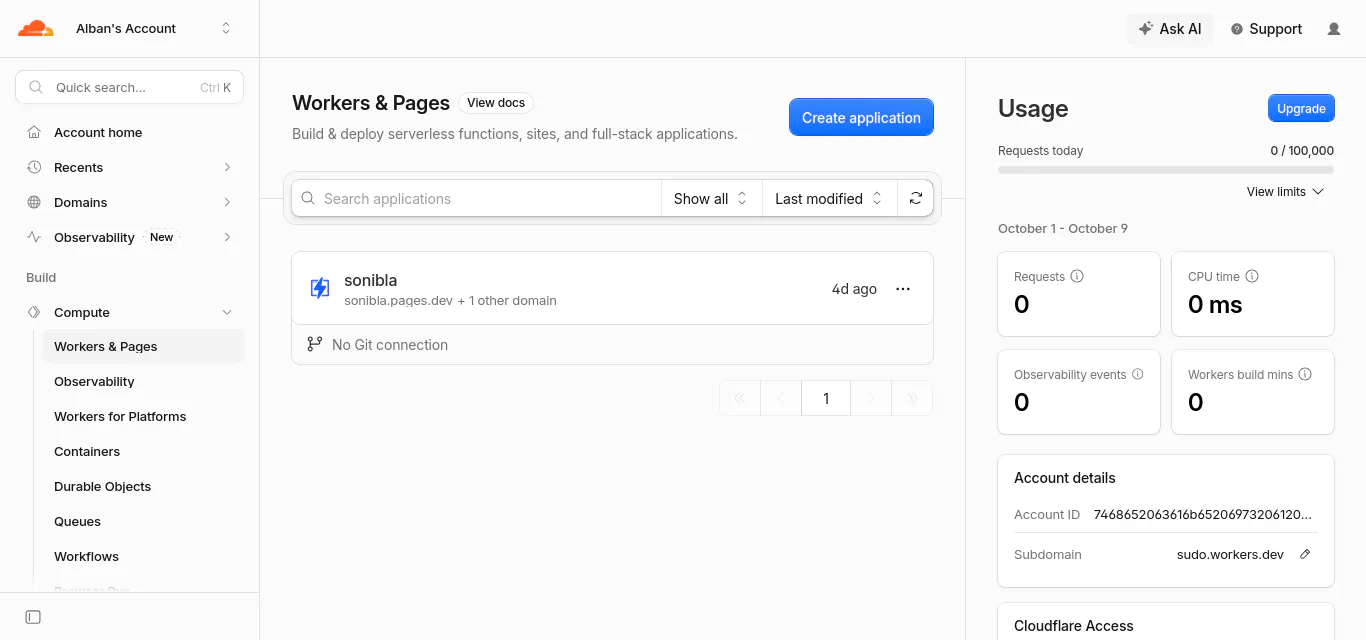
Click on Continue to Pages at the bottom of the dialog, then choose Drag and drop your files. This is needed in order to build your frontend on GitHub Actions (or your own CI) rather than Cloudflare’s CI, which is more limited on the free tier.
Choose a project name and upload a first deployment of your app.
Restrict access to staging
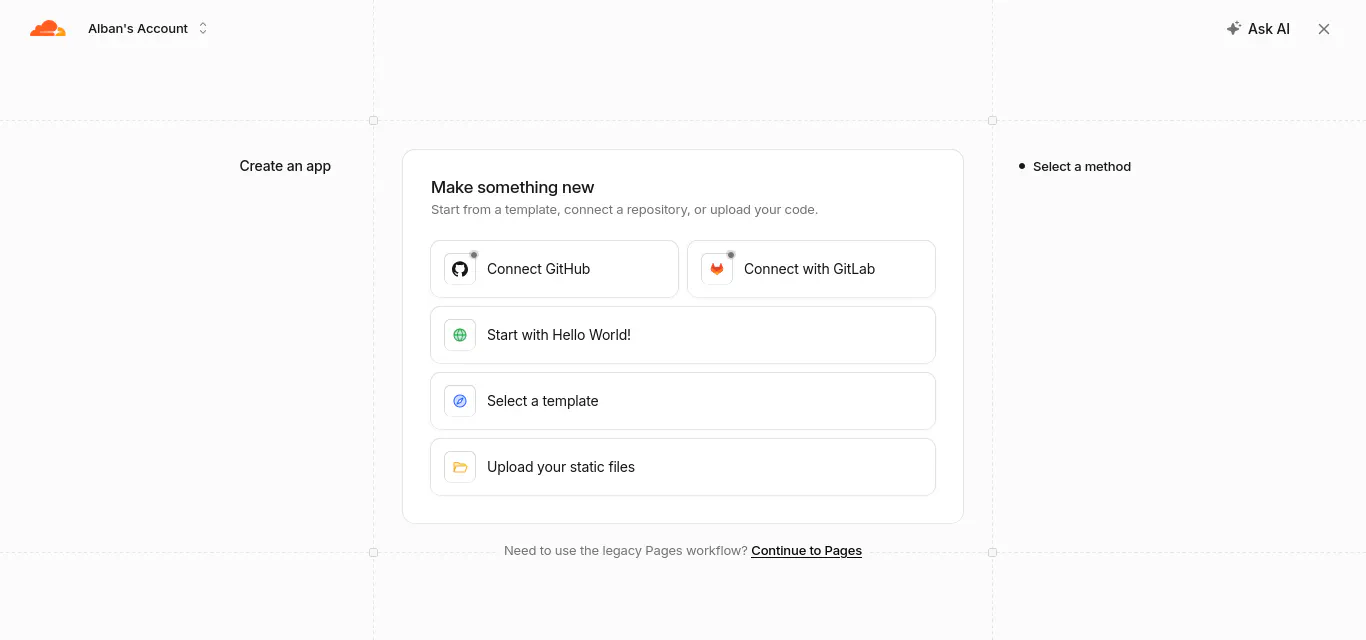
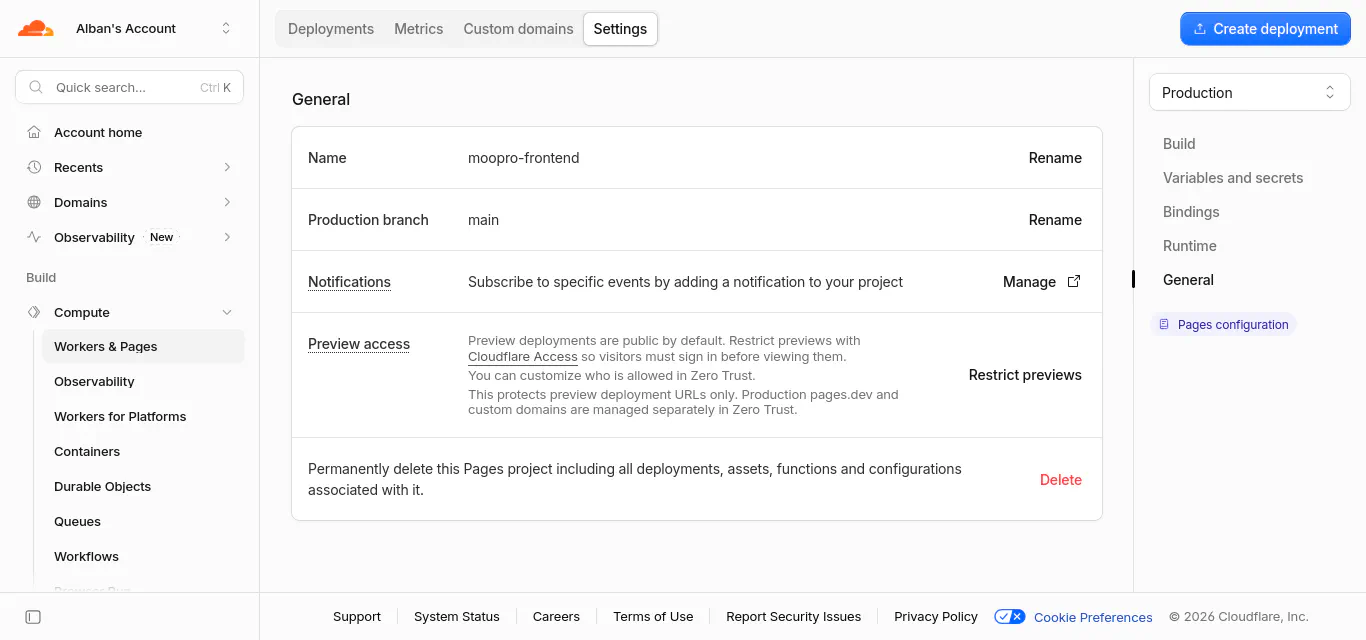
In the project settings, at the bottom, click on Restrict previews. Otherwise the preview deployment will be publicly accessible.
Add custom domain
In the project’s Custom domains page, click on Set up a custom domain. If your domain is using Cloudflare’s nameservers you won’t need to manually edit the records. Otherwise Cloudflare tells you what values you need to copy paste into the DNS zone.
You can add your domain to Cloudflare by doing to the Domains > Overview page and clicking on Add domain. This doesn’t transfers your domain to Cloudflare registrar, it only lets you use Cloudflare’s nameservers.
Prevent access to .pages.dev URL
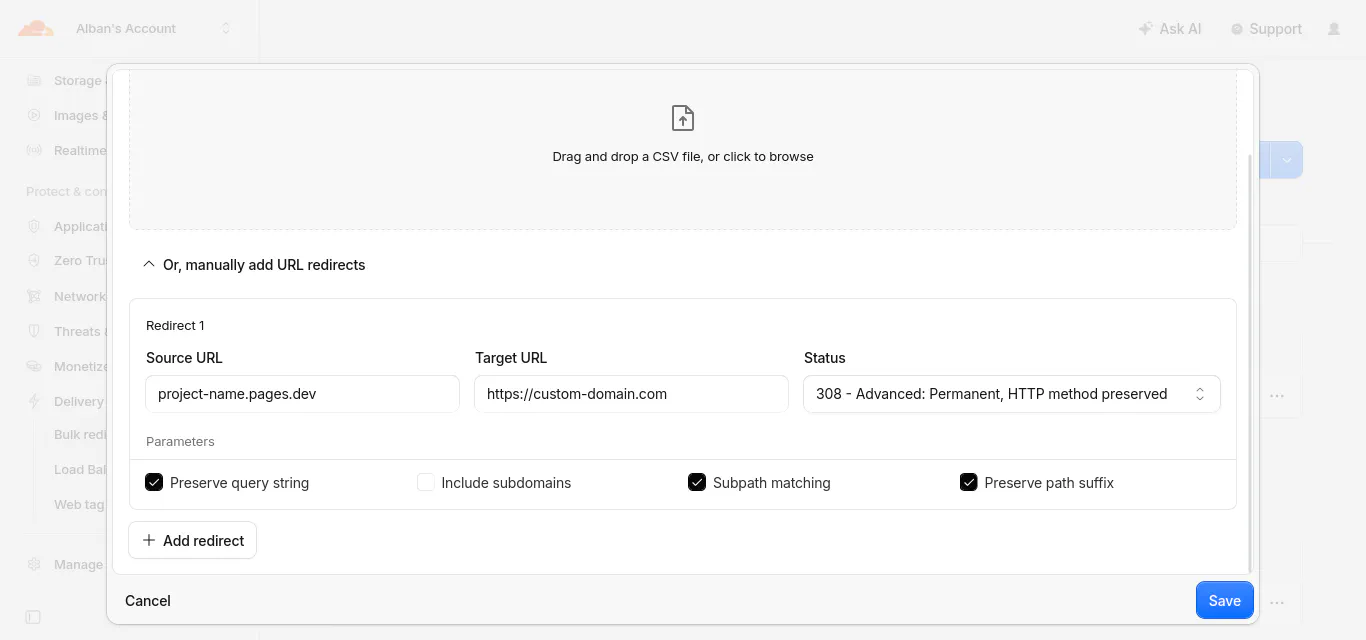
Your domain should be the only canonical URL of your website. Thus users trying to access the pages.dev URL should be redirected to your custom domain. We need to use Bulk Redirects because this kind of redirect isn’t covered by the _redirects file.
In the menu Delivery & performance > Bulk redirects.
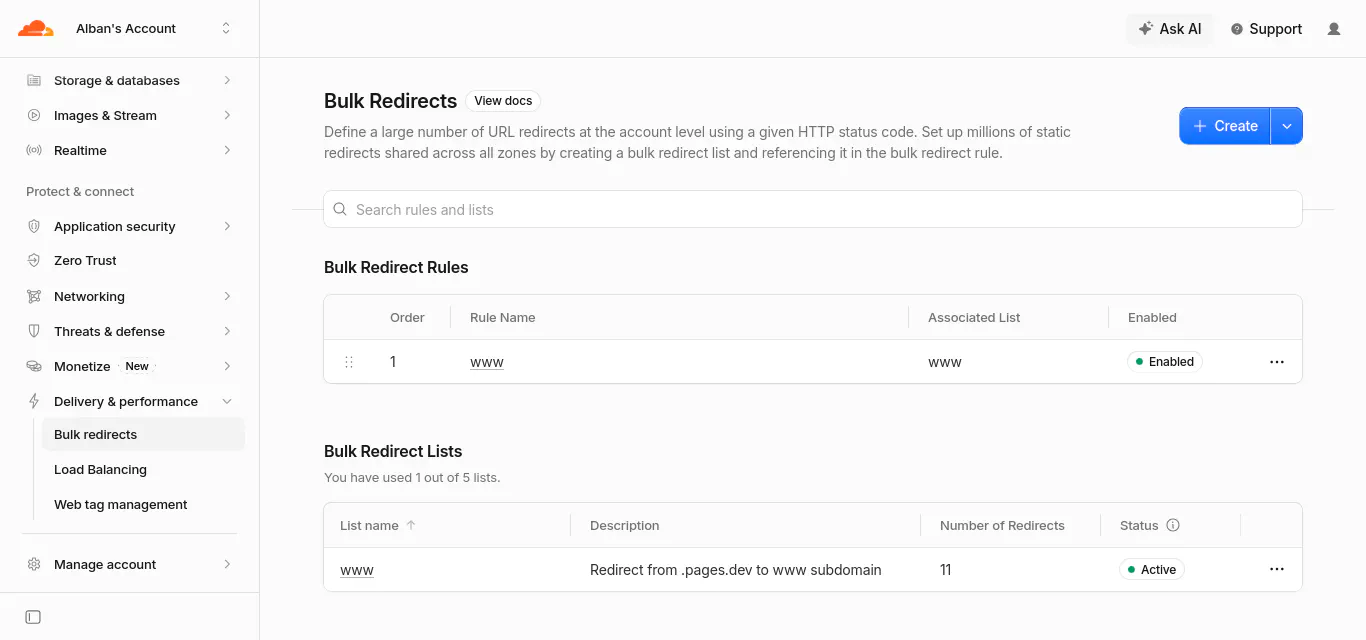
Create a list with a redirect from your pages.dev URL to your custom domain:
Redirect www subdomain to APEX
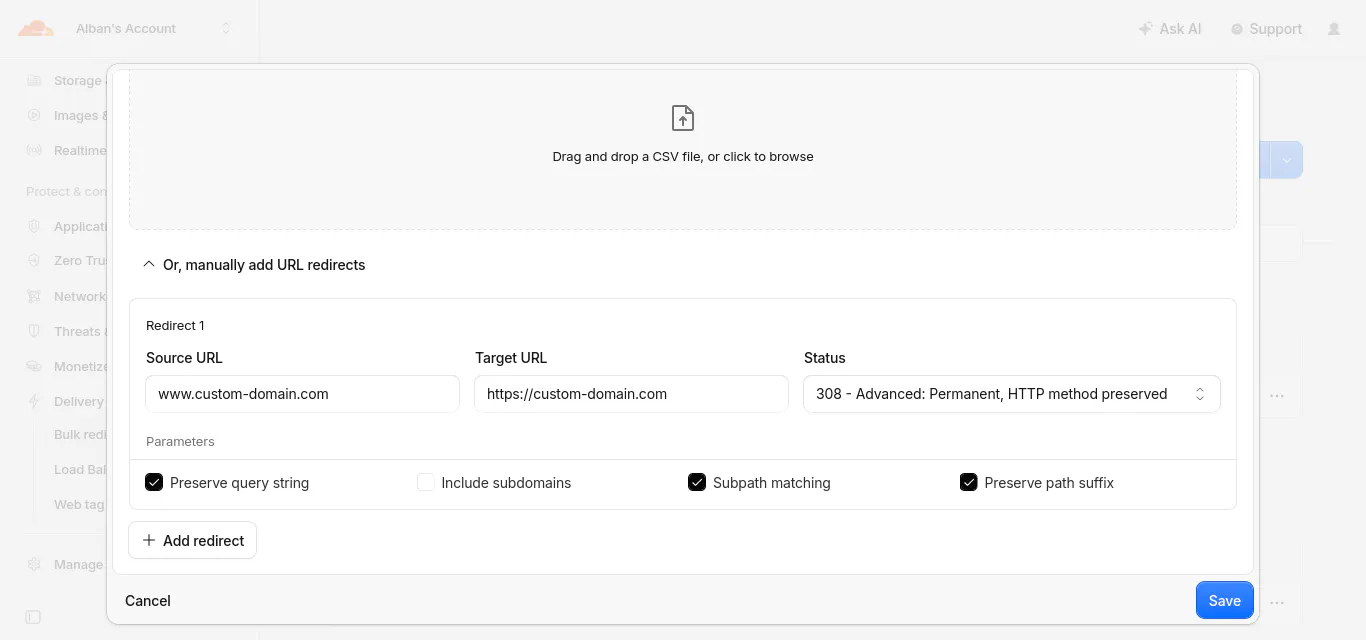
In case you deployed the web app to the APEX domain, it’s recommended to redirect www subdomain to APEX because many end users manually type www when navigating to websites.
To achieve that you need to set up another bulk redirect, and a CNAME www record pointing to the root.
The DNS record should look like this (proxied):

Set up continuous deployment
This step is specifically if your Cloudflare Pages project isn’t yet already linked o a git repository and you want to automatically deploy on push to your main branch (non-main branch pushes will still produce preview deployments).
Please refer to the official documentation for more details.
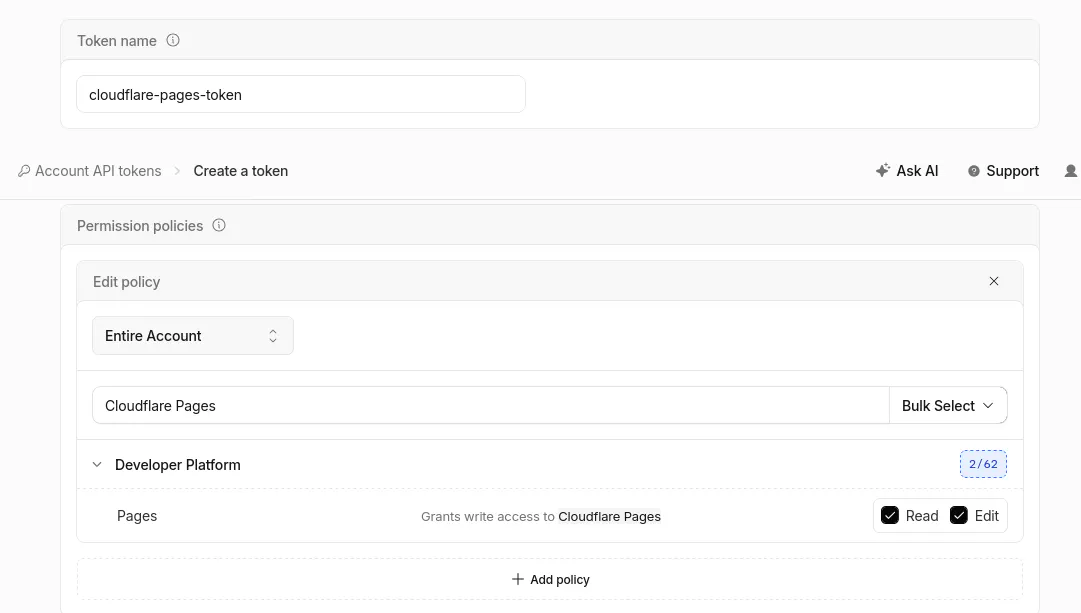
API token
Go to Account API tokens page and click Create Token. Grant the permissions to read and edit Cloudflare Pages:
Repository secrets
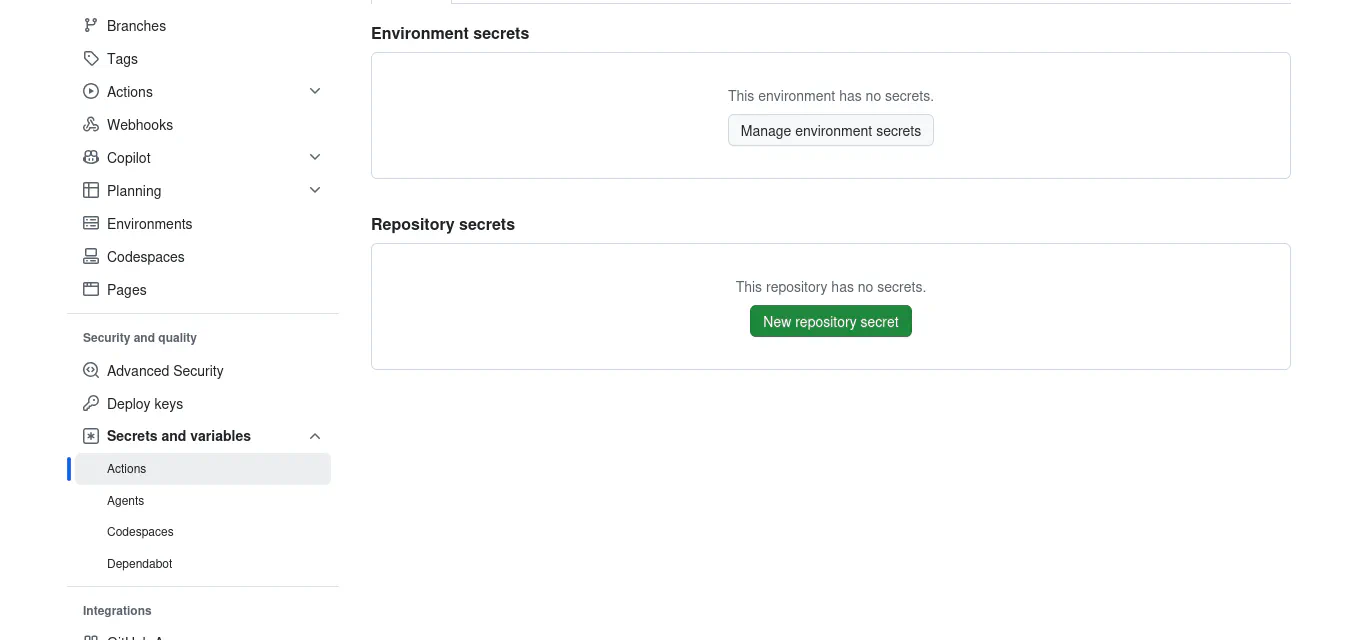
In the GitHub repository’s settings (Settings > Secrets and variables > Actions > Repository secrets), add the following secrets:
CLOUDFLARE_ACCOUNT_ID: copy paste your account ID from first stepCLOUDFLARE_API_TOKEN: copy paste your API token
Main branch
Make sure the name of your main branch on GitHub (usually main) matches the Production branch setting in the Cloudflare Pages project.
GitHub Actions workflow
Refer to the official GitHub Actions documentation if needed.
Here is an example of workflow that would automatically build and deploy your web app:
 1on: [push, workflow_dispatch]
 2jobs:
 3  deploy:
 4    runs-on: ubuntu-latest
 5    permissions:
 6      contents: read
 7      deployments: write
 8    name: Deploy to Cloudflare Pages
 9    steps:
10      - name: Checkout
11        uses: actions/checkout@v4
12      # Run your project's build step
13      # - name: Build
14      #   run: npm install && npm run build
15      - name: Deploy
16        uses: cloudflare/wrangler-action@v3
17        with:
18          apiToken: ${{ secrets.CLOUDFLARE_API_TOKEN }}
19          accountId: ${{ secrets.CLOUDFLARE_ACCOUNT_ID }}
20          command: pages deploy YOUR_DIRECTORY_OF_STATIC_ASSETS --project-name=YOUR_PROJECT_NAME
21 gitHubToken: ${{ secrets.GITHUB_TOKEN }}Next steps
This article is specifically scoped to deploying the web app. Check the post-deployment checklist for next steps (not Cloudflare Pages specific).